Tumbller Cryptobot System Design
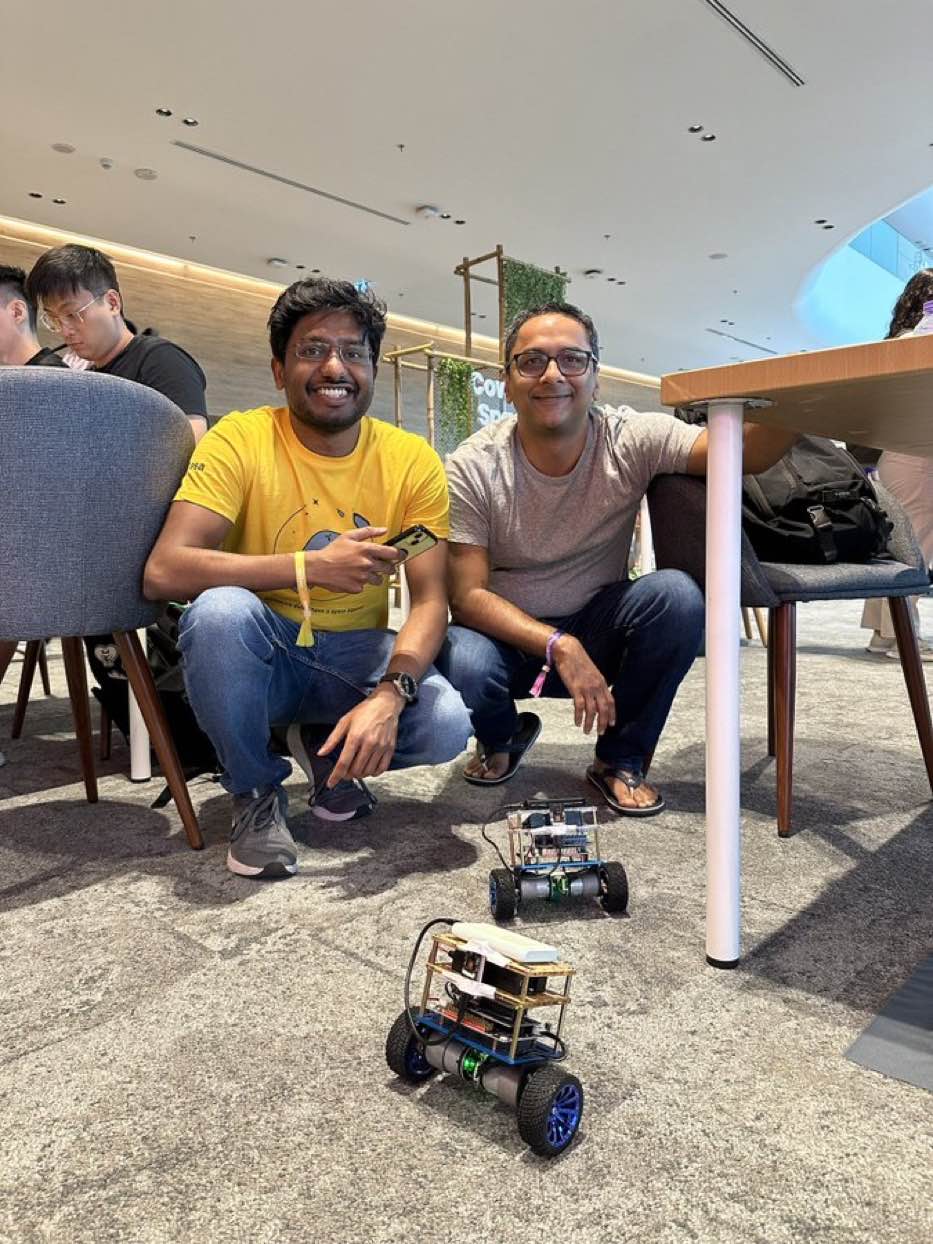
Last month, I was at Devcon 7 in Bangkok with my friends Venkat and Sachin. We had a small demo with our cryptobot Tumbllers there. Let’s have a look at the system design of the setup to understand how the tumbller cryptobot works.
Hardware
Tumbller is a self-balancing robotics educational kit from Elegoo. It runs on an Arduino Nano and does not have WiFi. To add WiFi to the Tumbller we decided to use an Arduino Nano ESP32 because it has the same pinout as Arduino Nano. But we had a small problem - the Tumbller PCB runs on 5V and Nano ESP32 on 3.3V. We designed a custom plugin board to fit on the Tumbller PCB with voltage level translator in between the MCU and PCB board. We got the plugin board manufactured from JLCPCB in China. The plugin board had some issues in bringing back the encoder and sensor signals back to Arduino Nano ESP32. So we added the caster wheel to the robot to allow testing robot without self-balancing functionality.

Here is a 3D render of the plugin board we designed.
The video stream from our YakRover weekly meetings where I explain the entire process of PCB design and manufacturing for Tumbller Plugin.
We also put a camera ESP32 on the robot to make it FPV bot. The camera is basically ESP32-CAM devkit. Each of our tumbller had two ESP32 microcontrollers. Both the ESP32 MCUs connected to the same wifi access point. Let’s call the ESP32 MCU controlling the tumbller robot motion tumbller-esp32-s3 and the camera ESP32 as tumbller-esp-cam. Each of the ESP32 MCU exposed functionalities or affordances of the robot on the local network as a http REST endpoint.
Software
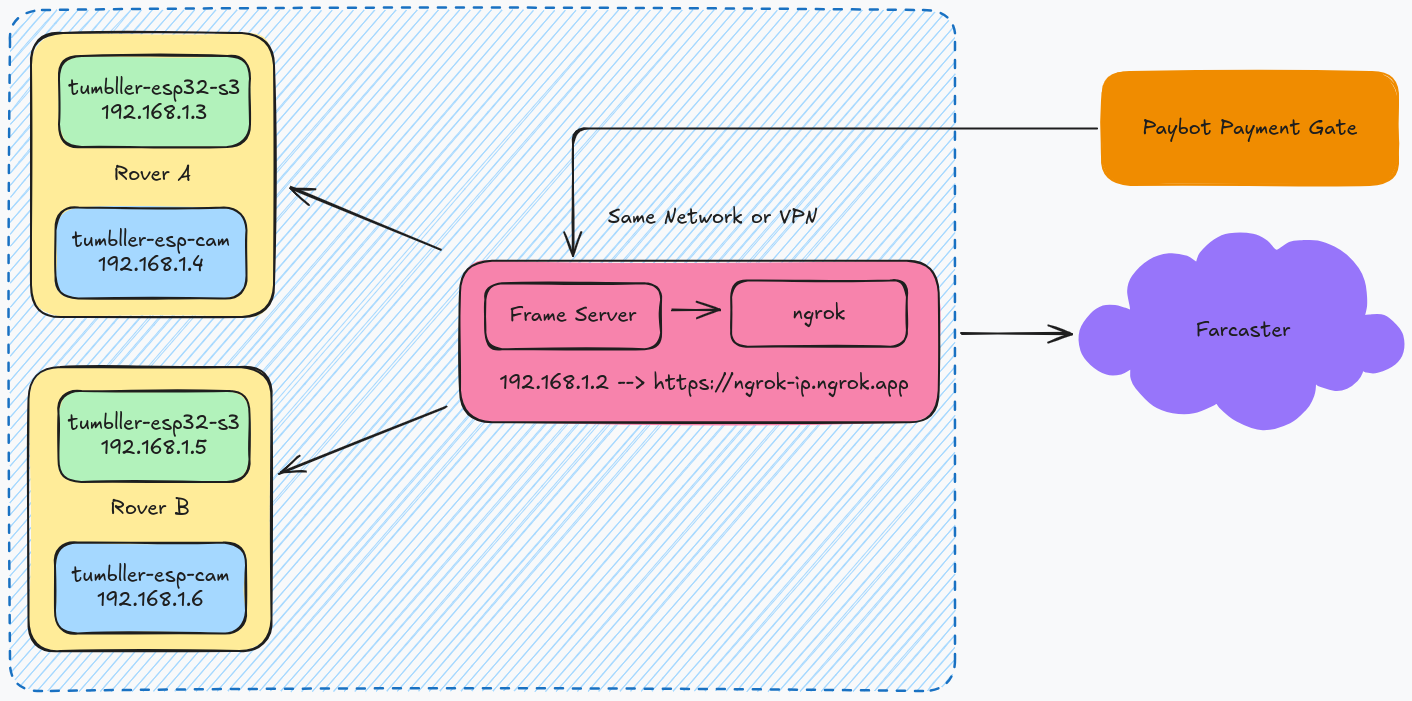
A bird’s eye view of the software stack to control the robots with farcaster frame-v1 and paybot payment gate is shown below.

The tumbller-esp32-s3 exposes the motion and motor control affordance of the cryptobot via five endpoints by running a webserver. The endpoints /move/forward, /move/backward, /move/left, /move/right and /move/stop control the movements for forward, backward, left, right and stop respectively.
The tumbller-esp-cam exposes the camera image via the /getImage endpoint so that when a GET request is sent to the endpoint, the server on tumbller-esp-cam would return a image taken by the camera.
The server for frames-v1 is written in python. The frames-v1 server, tumbller-esp32-s3 and the tumbller-esp-cam need to be on the same network or VPN. We used tailscale to put all three on the same VPN. The ESP32s can be exposed on the tailscale VPN with tailscale subnets. If the frames server is running locally on a computer without DNS name then ngrok can be used to expose to the outside world. The payment gate for the rovers is generated using the awesome Paybot farcaster bot by Rob Recht and Richard Sun. They helped us a lot in setting up the payment gate quickly with their farcaster bot.
The frame-v1 server sits in between the Tumbllers and farcaster translating the frame UI actions to appropriate tumbller-esp32-s3 and tumbller-esp-cam REST calls. I explain and help the setup of the frame server for Venkat’s Tumbller in Seattle here in this video.
The current version of the farcaster frame-v1 server allows selection between two rovers and manages the session and payment gates for each rover independently. Each session runs for 2 minutes after a payment of 1USDC.
Devcon and future work
We did have small hiccups during setup at Devcon but we were able to solve all the problems and have the demo running for the two rovers at Devcon.
First we had some problems with the WiFi setup because of 2.4GHz congestion and Tailscale VPN. Since I had the ESP32s on a subnet via the RaspberryPi, they would become invisible without the RaspberryPi to my frame-v1 server without the Raspberry turned on even though all the devices were on the same network. It took me almost a day to figure this out. As a temporary solution at Devcon I turned off the VPN after which the system worked nicely.
I also had problems figuring out how to trigger a particular user’s wallet with fid information from user interaction with frame and paybot. I finally just used the farcaster-py library to get the fname from fid and then use the fname and paybot together to get the payment gate working properly.
But after these two problems were solved the system mostly worked smoothly.
Video: Sachin playing with the cryptobot
There is a lot of improvement still needed and a quick list suggested by Venkat in our discord group.
- Ruggedize basics (new board, wheel mechanics fixing, permanent mount for cam, cleaner comms architecture)
- UI bugs on frames
- Fix wallet flow limitations
- Better UX (eg photo per step, display)
- Expand payload (sensors etc)
- Onchain memory, recording images, game aspect etc
- Extend to sunfounder and non crypto UX
- Crypto-economic UX
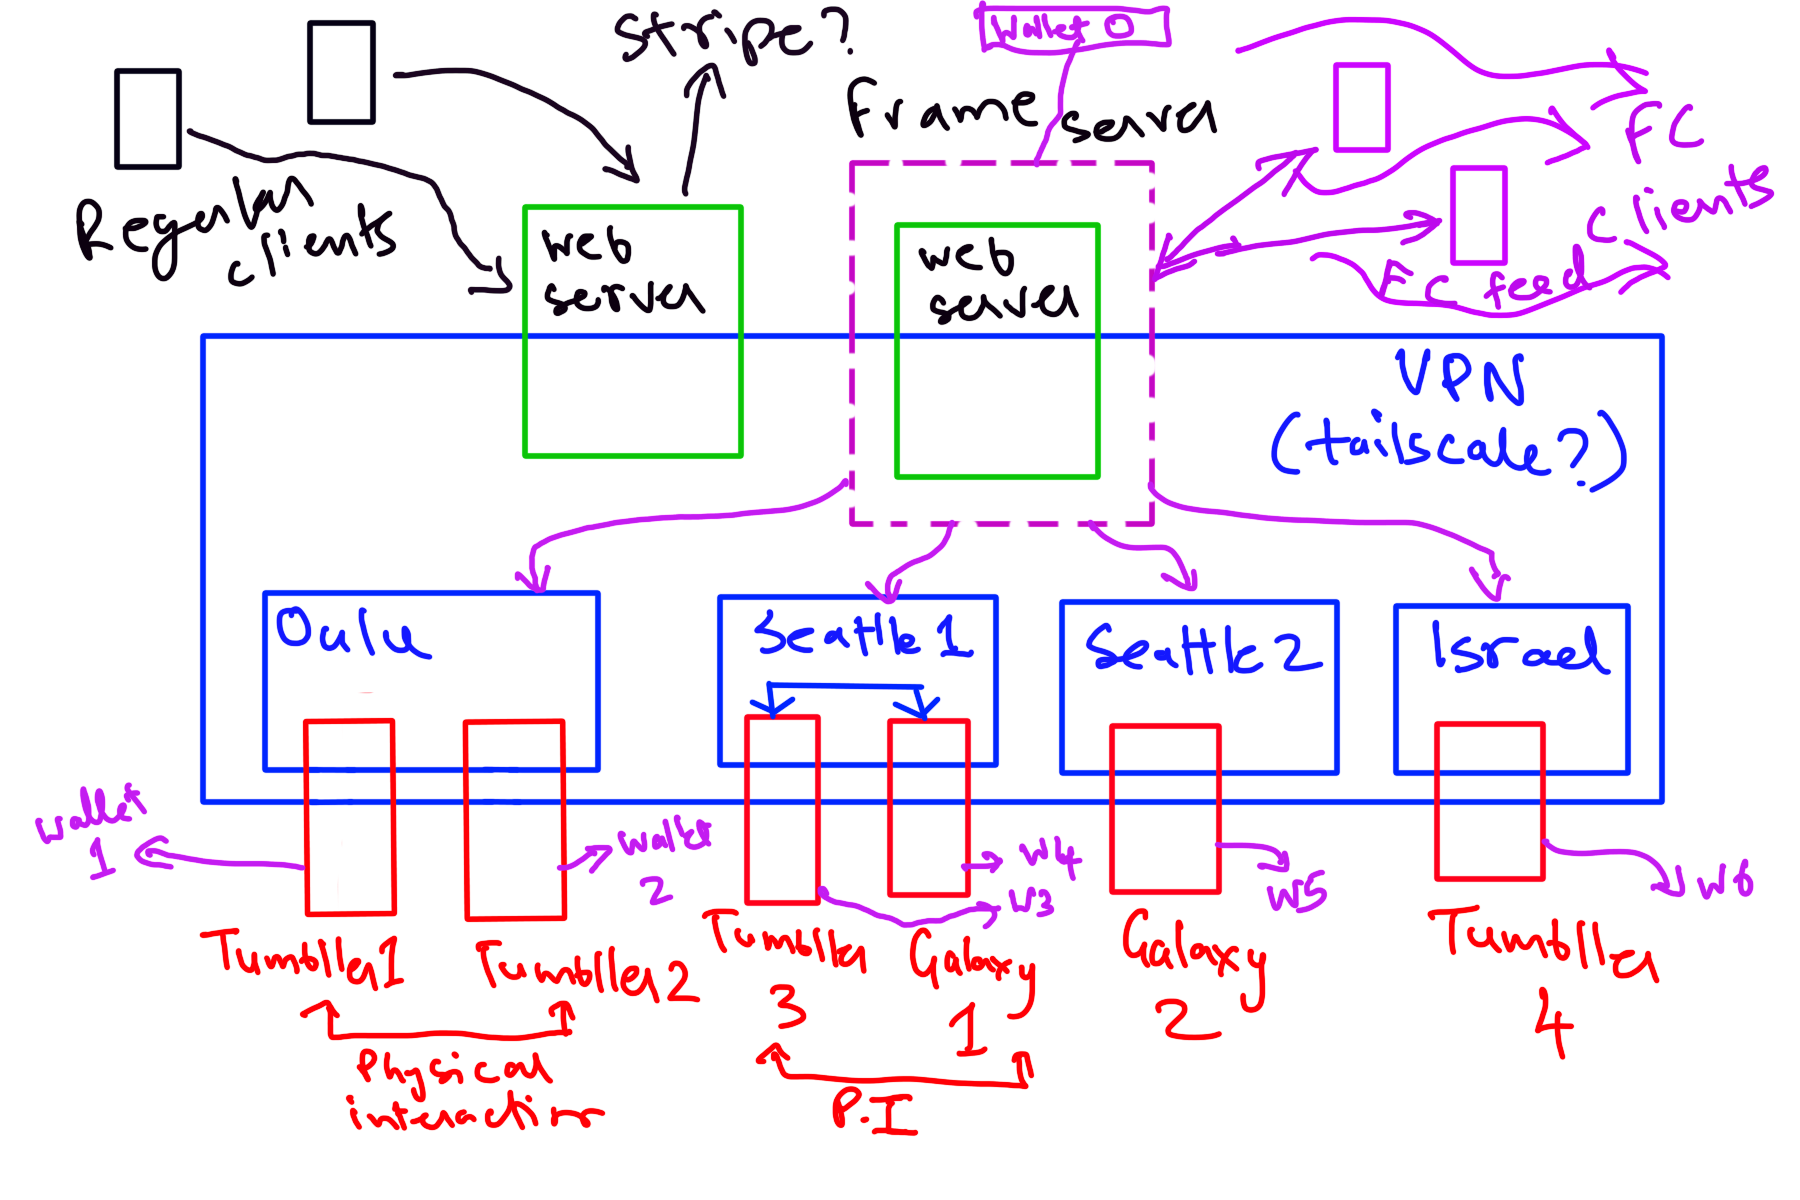
We had a discussion about the future steps for our cryptobot network on our Yak Robotics Garage Weekly Meeting.
For the next steps, we should be able to get some parts of the system design shown below in the coming months with frames-v2.
For a speculative riff on Crypto-economics of the rovers here is Venkat’s post on his substack Contraptions

I have been showing around our social cryptobots to people at Devcon and later here in Finland. It is really satisfying to watch people’s reactions to the social cryptobots. There seems to be something rather unique about them because it resonates with so many people with a wide variety of backgrounds, engineers and non-engineers alike.
We are in the process of making an update to the plugin board so that other people could just buy the Tumbller kit and join the cryptobot party.


